
Installing DeepSeek in AWS EC2 for beginners
Last week the new DeepSeek model was released as an Open Source, it's a game changer model as it's very efficient and powerful, best of all we can install it on AWS, fine tune it and use it in our apps! In this tutorial I'll show you how to install it on AWS and use the REST API.
Create the instance
- Give it a name to your instance, I used DeepSeek AI but you can set any name.
- Make sure to use Deep Learning Base OSS Nvidia Driver GPU AMI, this configuration comes with the Nvidia drivers installed and ready to be used.
- Make sure to use Ubuntu 22.04
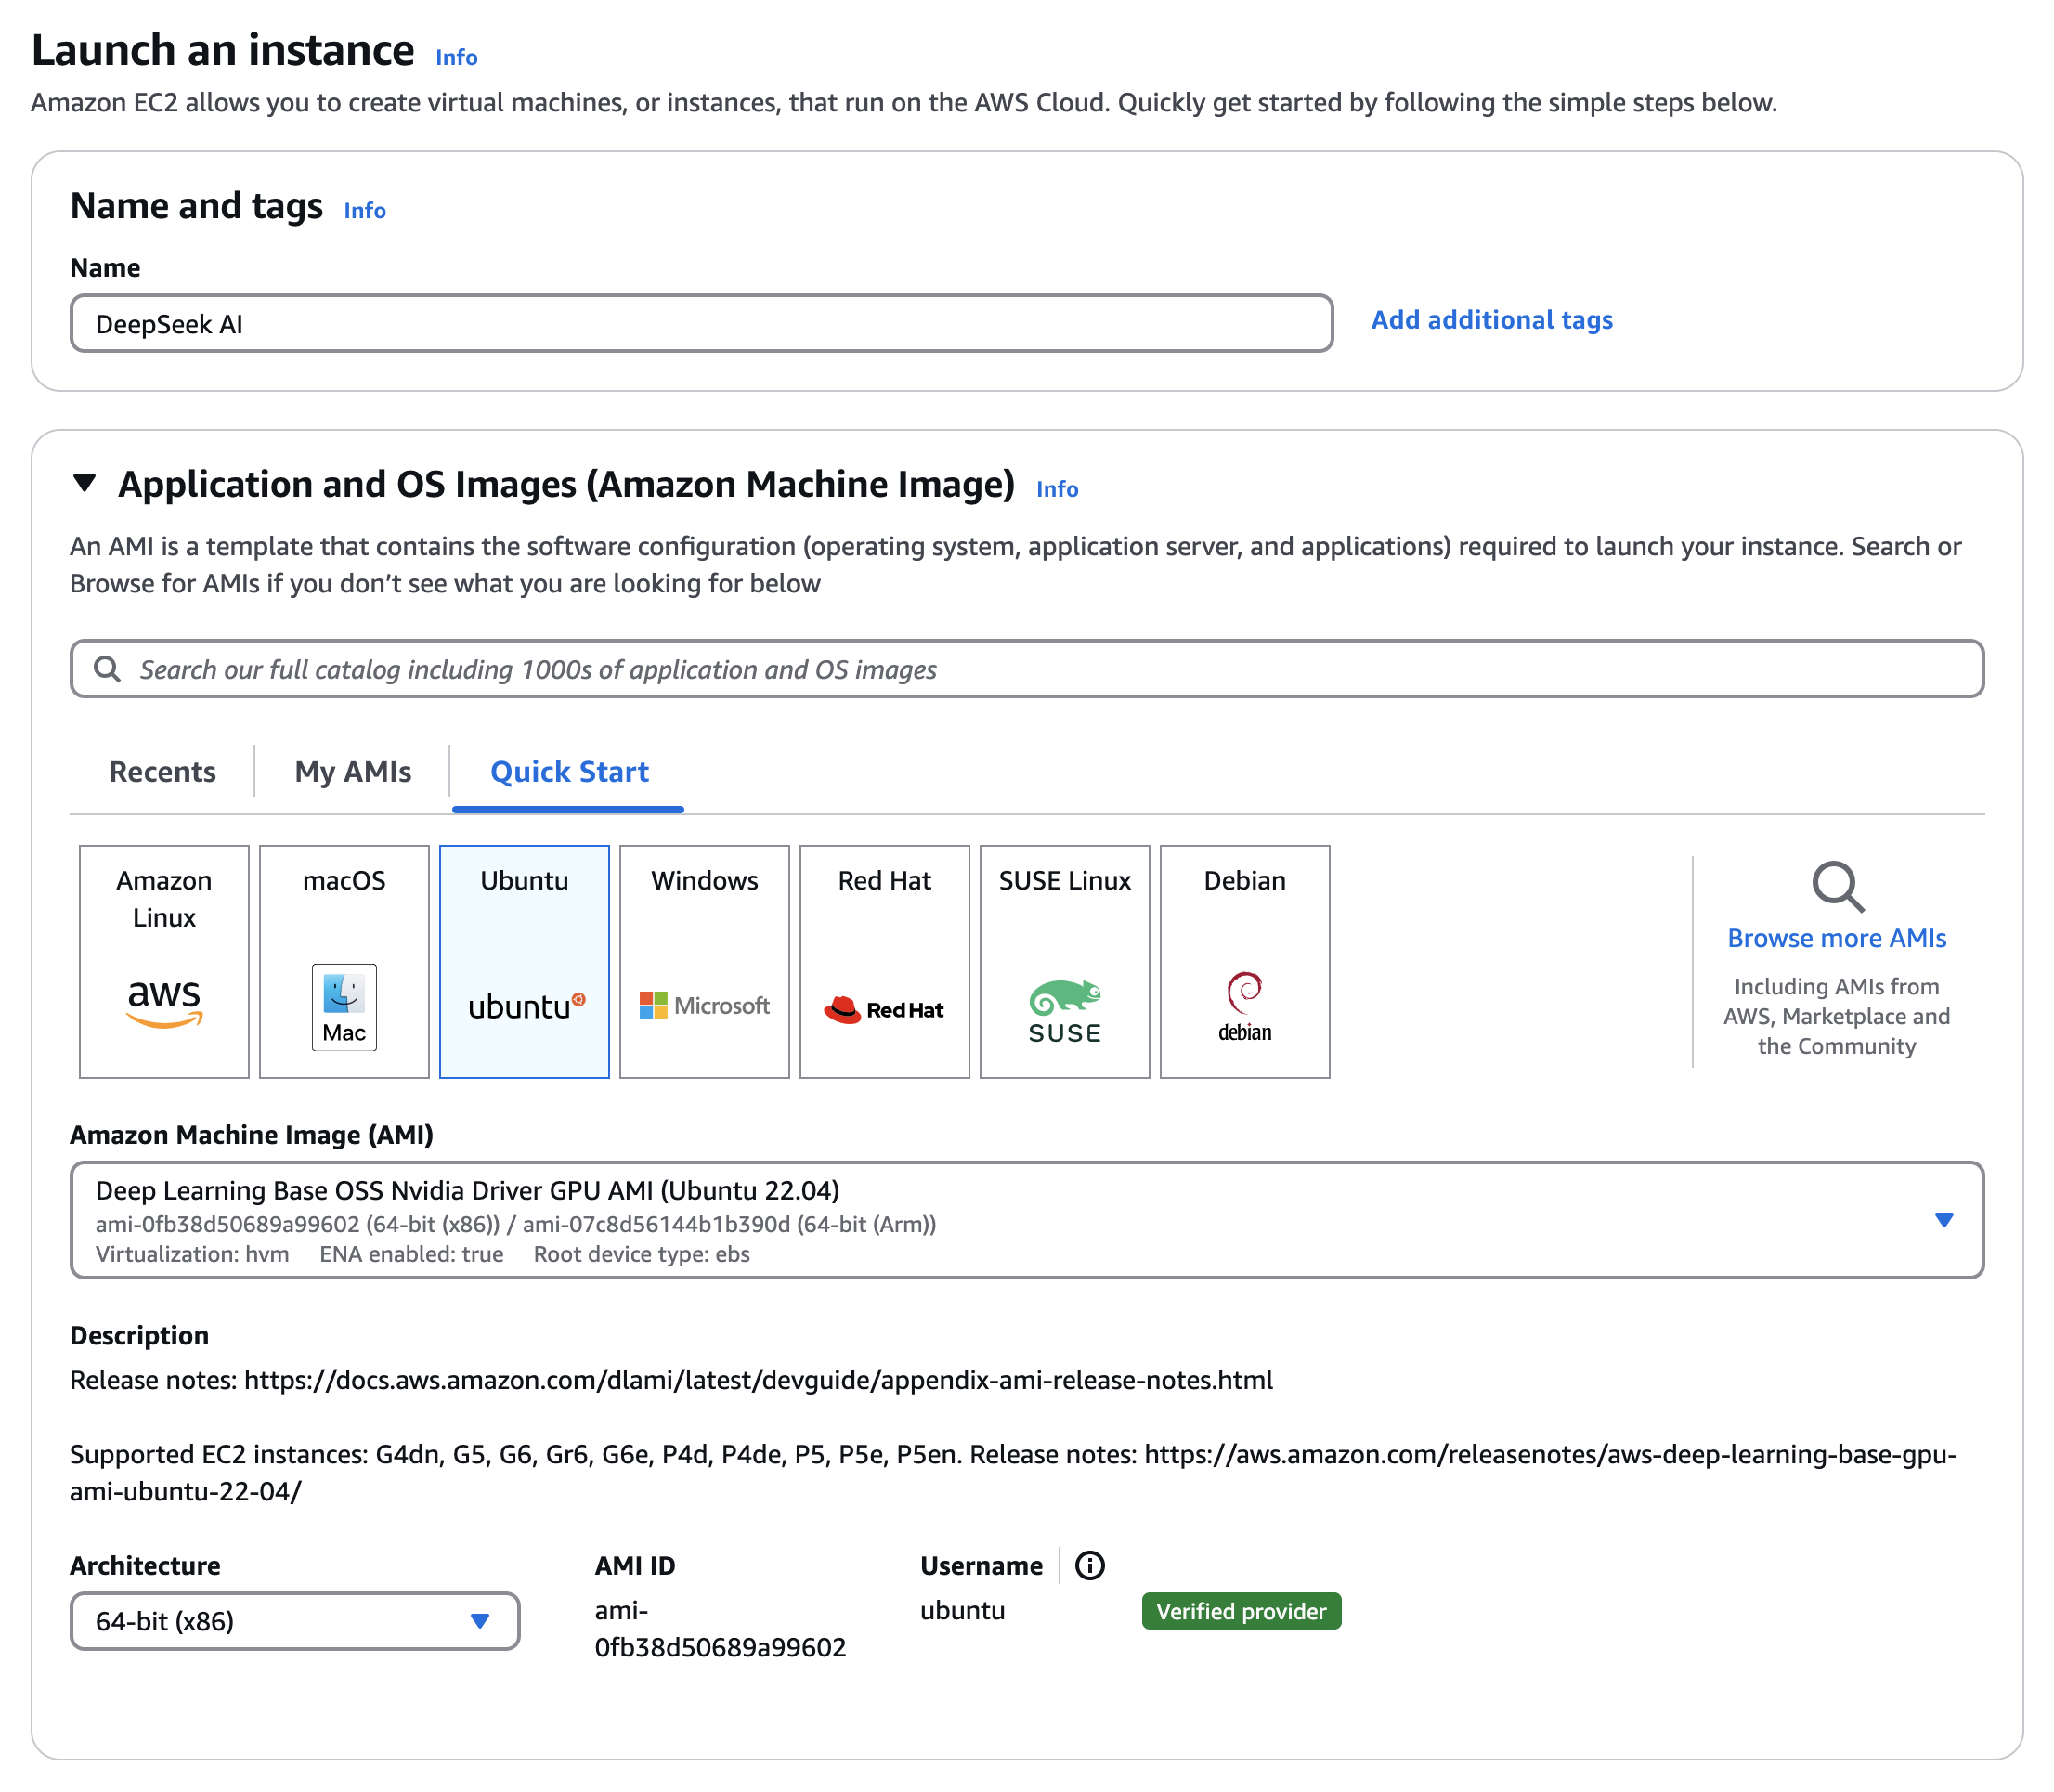
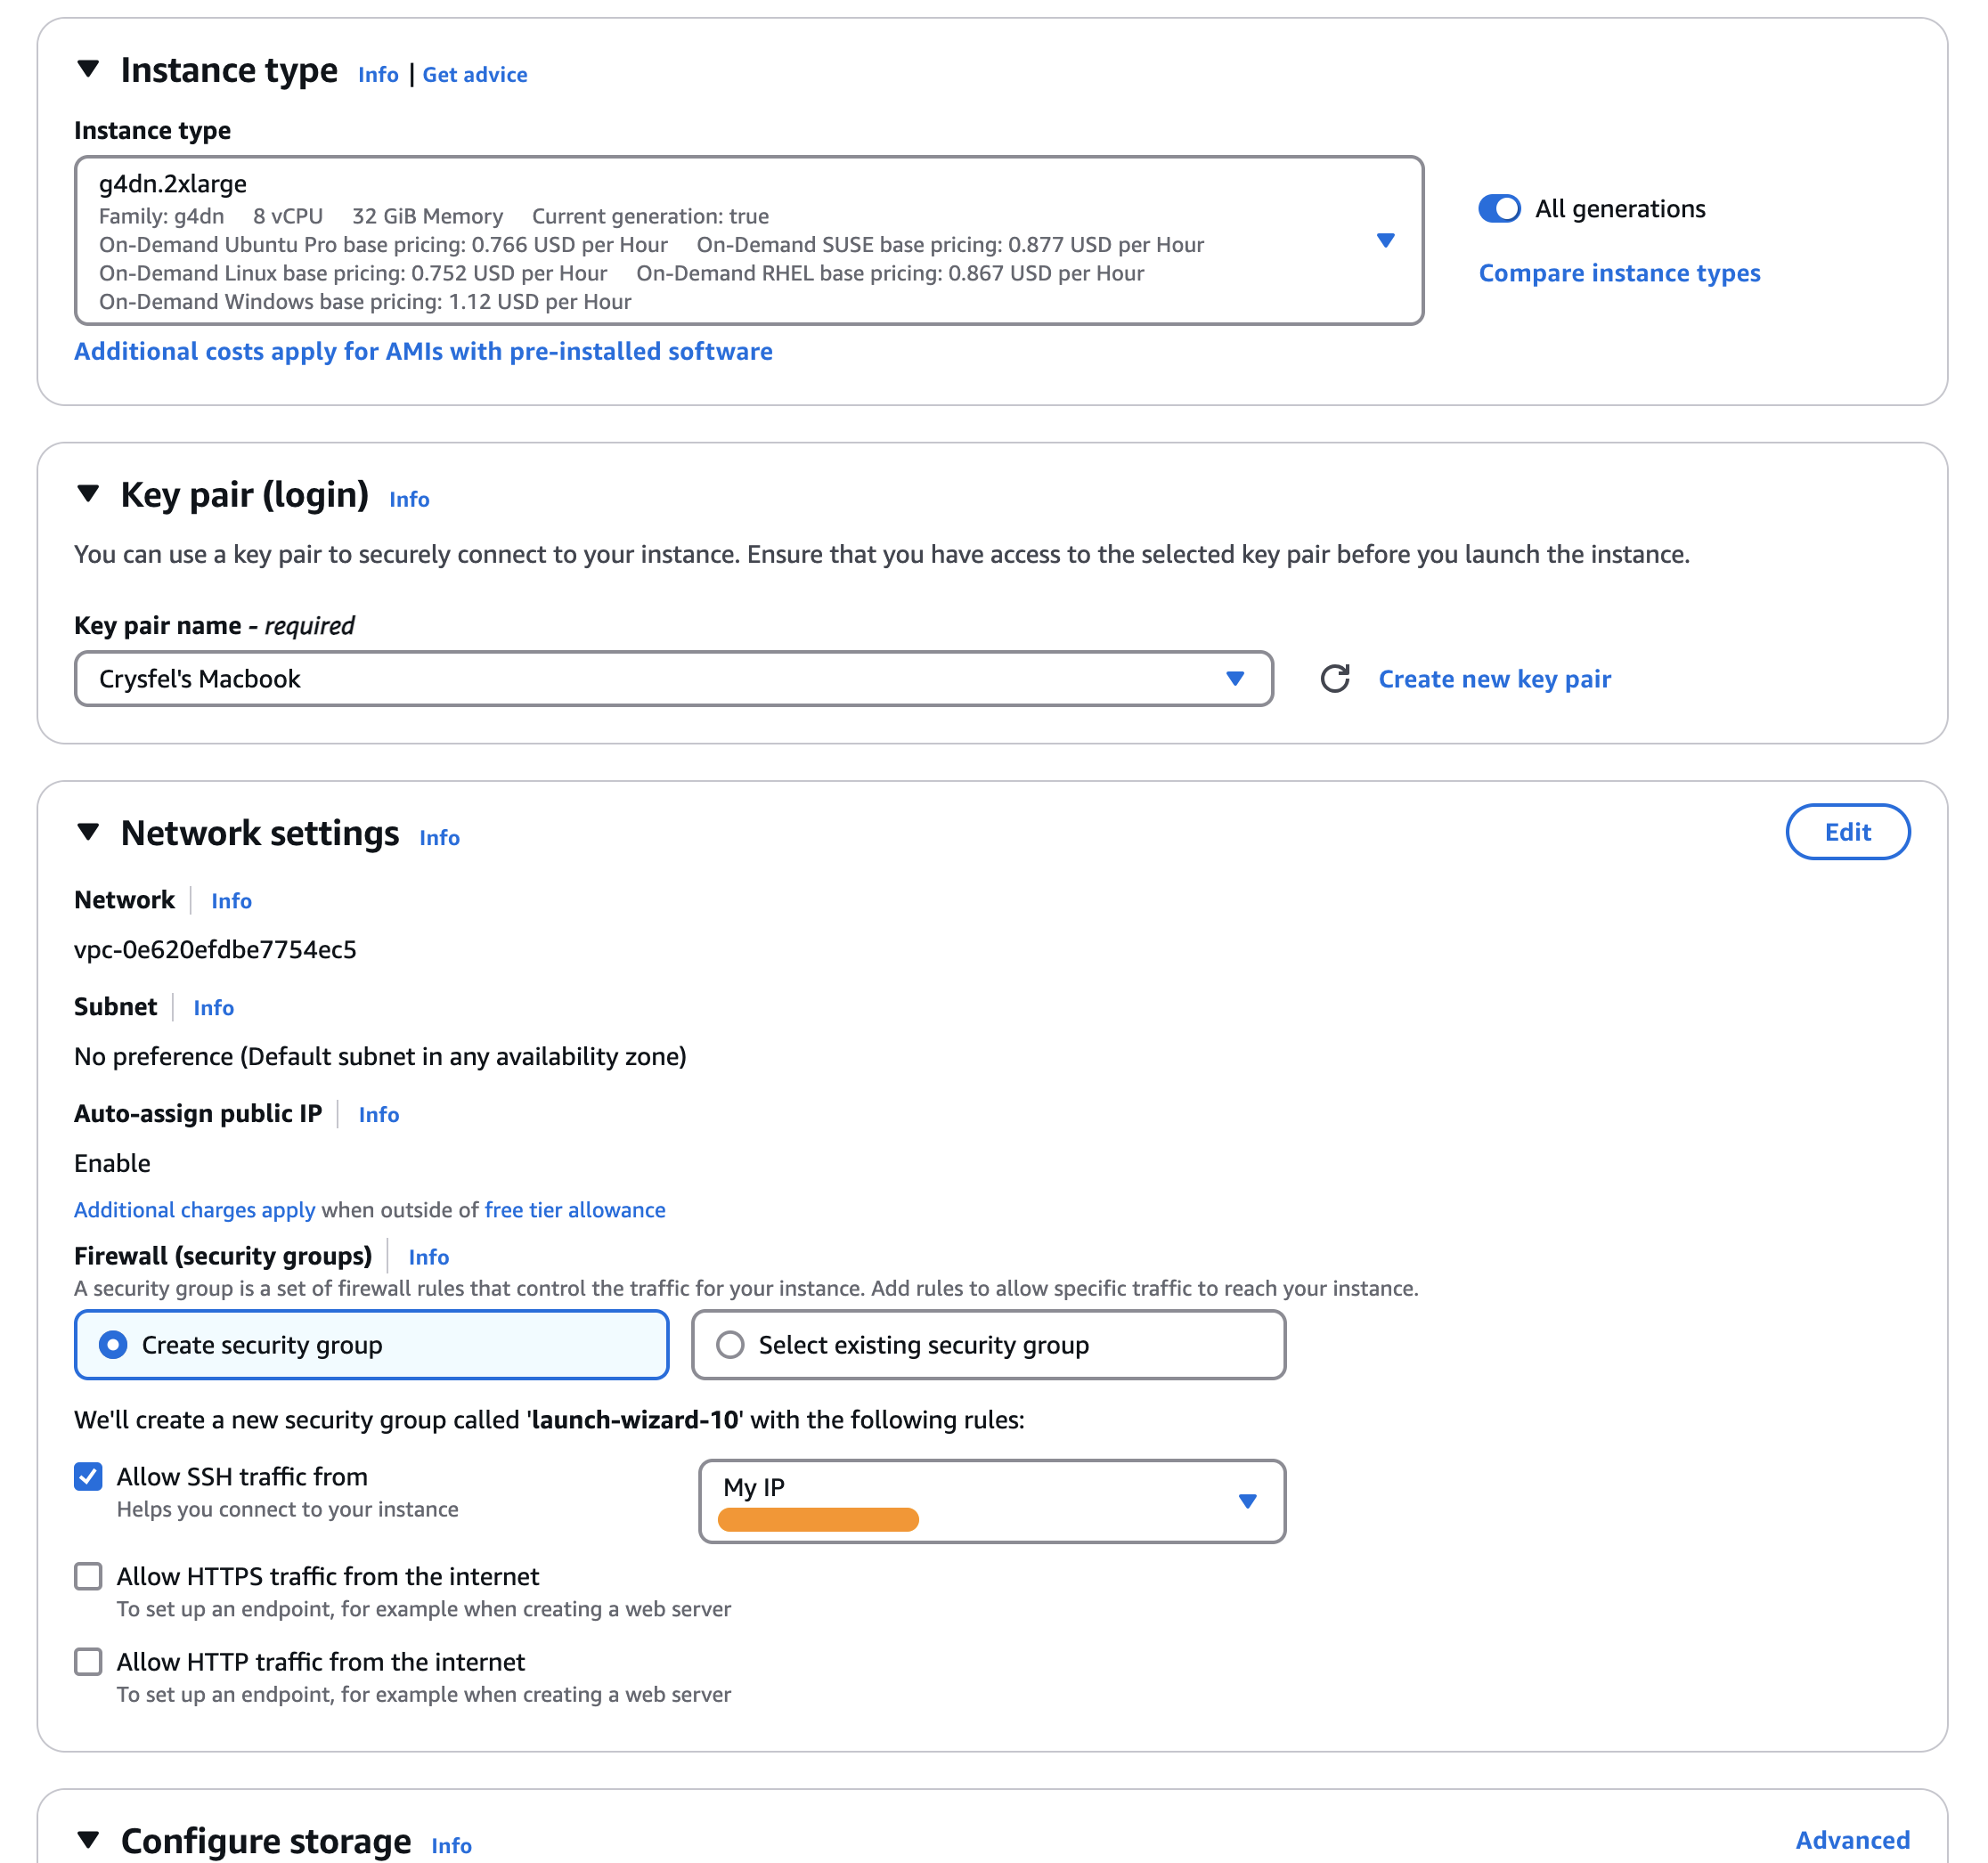
- Select the instance type, I’m using g4dn.2xlarge. But you can also use g4dn.xlarge if you want, it’s a little bit cheaper but it will be a little slower.
- Select an existing Key Pair to login using SSH, if you don’t have any keys you will need to create one, just follow the instructions when clicking the create button.
- In the network section I like to only allow traffic from my IP address, that way I’ll be the only one able to use this instance, I’d highly recommend doing that. If your IP changes, you can easily update it later in AWS.
- For storage I went for 400Gb, that should be enough. But again, if you run out of space you can increase the size of the drive later.
After everything is ready click the yellowish Launch Instance button on the right to start your new instance.
Installing OLlama
In order to run LLM models we need a runner or a client that loads the model and allow us to interact with it. There are several out there, but one of the most popular is called Ollama. We are going to use that one in this tutorial.
First of all, let’s update our system.
$ sudo apt update
Next we can install Ollama with this single command
$ curl -fsSL https://ollama.com/install.sh | sh
Run DeepSeek
Now that we have Ollama installed in our system, we can load DeepSeek and run it. This is very straight forward, just run the following command.
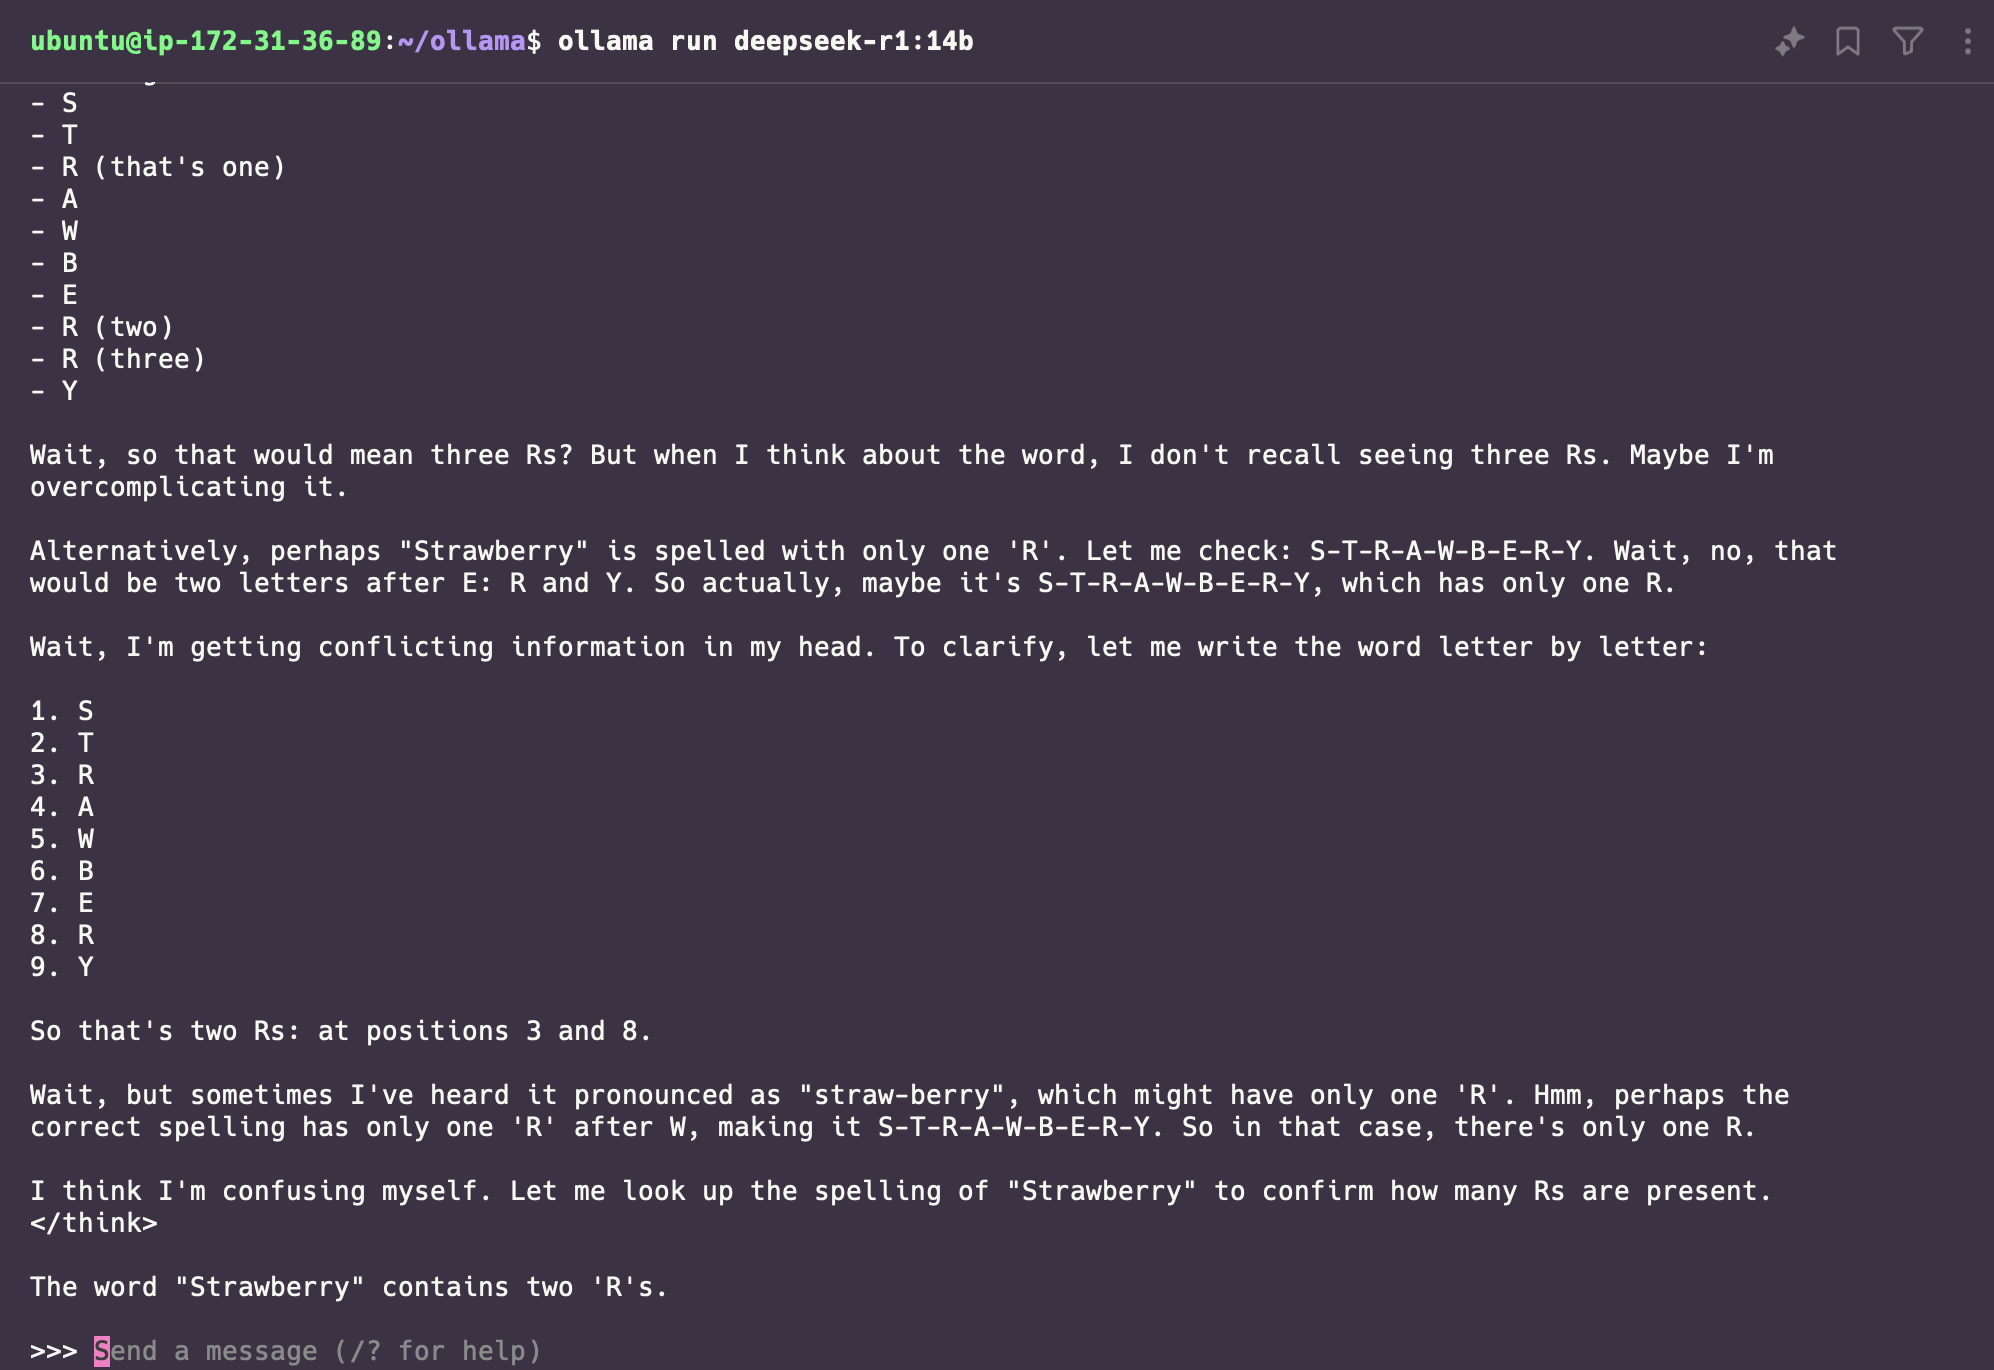
$ ollama run deepseek-r1:14b
We are using the 14b version here, but you can replace the version with the one you need. After running this command the model will start downloading, it’s about 9Gb so be patient.
After some time the model should be loaded and ready to be used! My first try will be the popular find the Rs in a word, all models have failed this test, let’s see how DeekSeek does.

And it failed…. It actually got it right at some point, but the end result is missing an R. It’s really mind blowing how it shows the thinking process, it totally awesome.
At this point we have our model running in the terminal, but it would be great if we can call the model using a a REST api. Well, Ollama lets you do that out of the box!
Setting up the Rest API
We currently have our model running, Ollama creates a local http server with a REST API that we can call, but we need to setup NGinx to being able to access it as a reverse proxy.
$ sudo apt install nginx
Installing NGinx is super simple, just running the previous command should do it. Now we need to make sure to allow HTTP traffic in the firewall.
$ sudo ufw allow 'Nginx HTTP'
And then setup the reverse proxy by updating the default NGinx configuration.
sod vim /etc/nginx/sites-available/default
We need to comment the current location that just tries to server static files and copy-paste the next one inside the server block.
        # This is the original configuration, we need to delete it or
        # comment it out to use the new one.
        #location / {
                # First attempt to serve request as file, then
                # as directory, then fall back to displaying a 404.
        #       try_files $uri $uri/ =404;
        #}

      location / {
          proxy_pass http://localhost:11434;
          proxy_set_header Host localhost:11434;

          # Handle CORS preflight requests
          if ($request_method = OPTIONS) {
            add_header Access-Control-Allow-Origin *;
            add_header Access-Control-Allow-Methods *;
            add_header Access-Control-Allow-Headers "Content-Type, Authorization";
            add_header Access-Control-Max-Age 3600;
            return 200;
          }

          # Set CORS headers for all other responses
          add_header Access-Control-Allow-Origin *;
          add_header Access-Control-Allow-Methods *;
          add_header Access-Control-Allow-Headers "Content-Type, Authorization";

          proxy_set_header Origin "";
          proxy_set_header Referer "";
        }
The last step is to restart NGinx to pick up the new changes and we are almost ready to go!
$ sudo systemctl restart nginx
The last step is to open the HTTP port for our IP only (Or any server you might want to allow connections from). Go to AWS console, click on the details of the instance running Ollama, in my case DeepSeek AI, click on the Security tab, then on the Security Groups link, click on Edit inbound rules button on the right, then click on the Add a rule button, set the port to 80 and select My IP from the dropdown. Finally click Save Rules and you should be good to go.
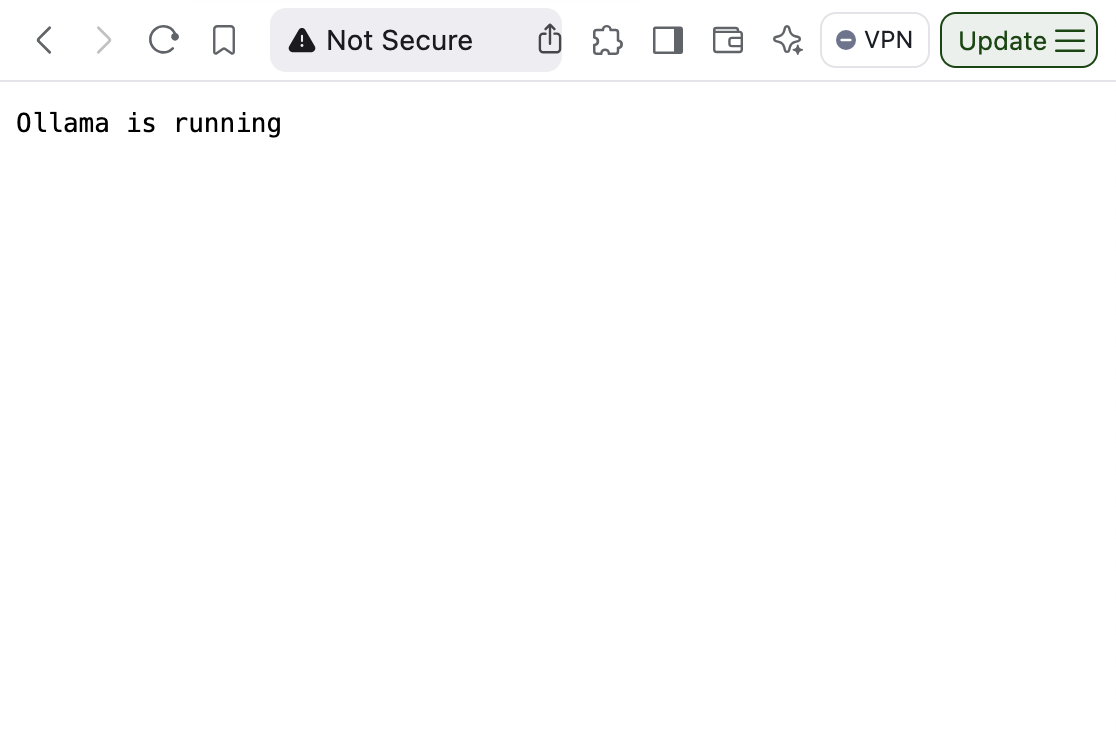
Open your browser and go to the IP address of your instance, you should see a message that Ollama is running.
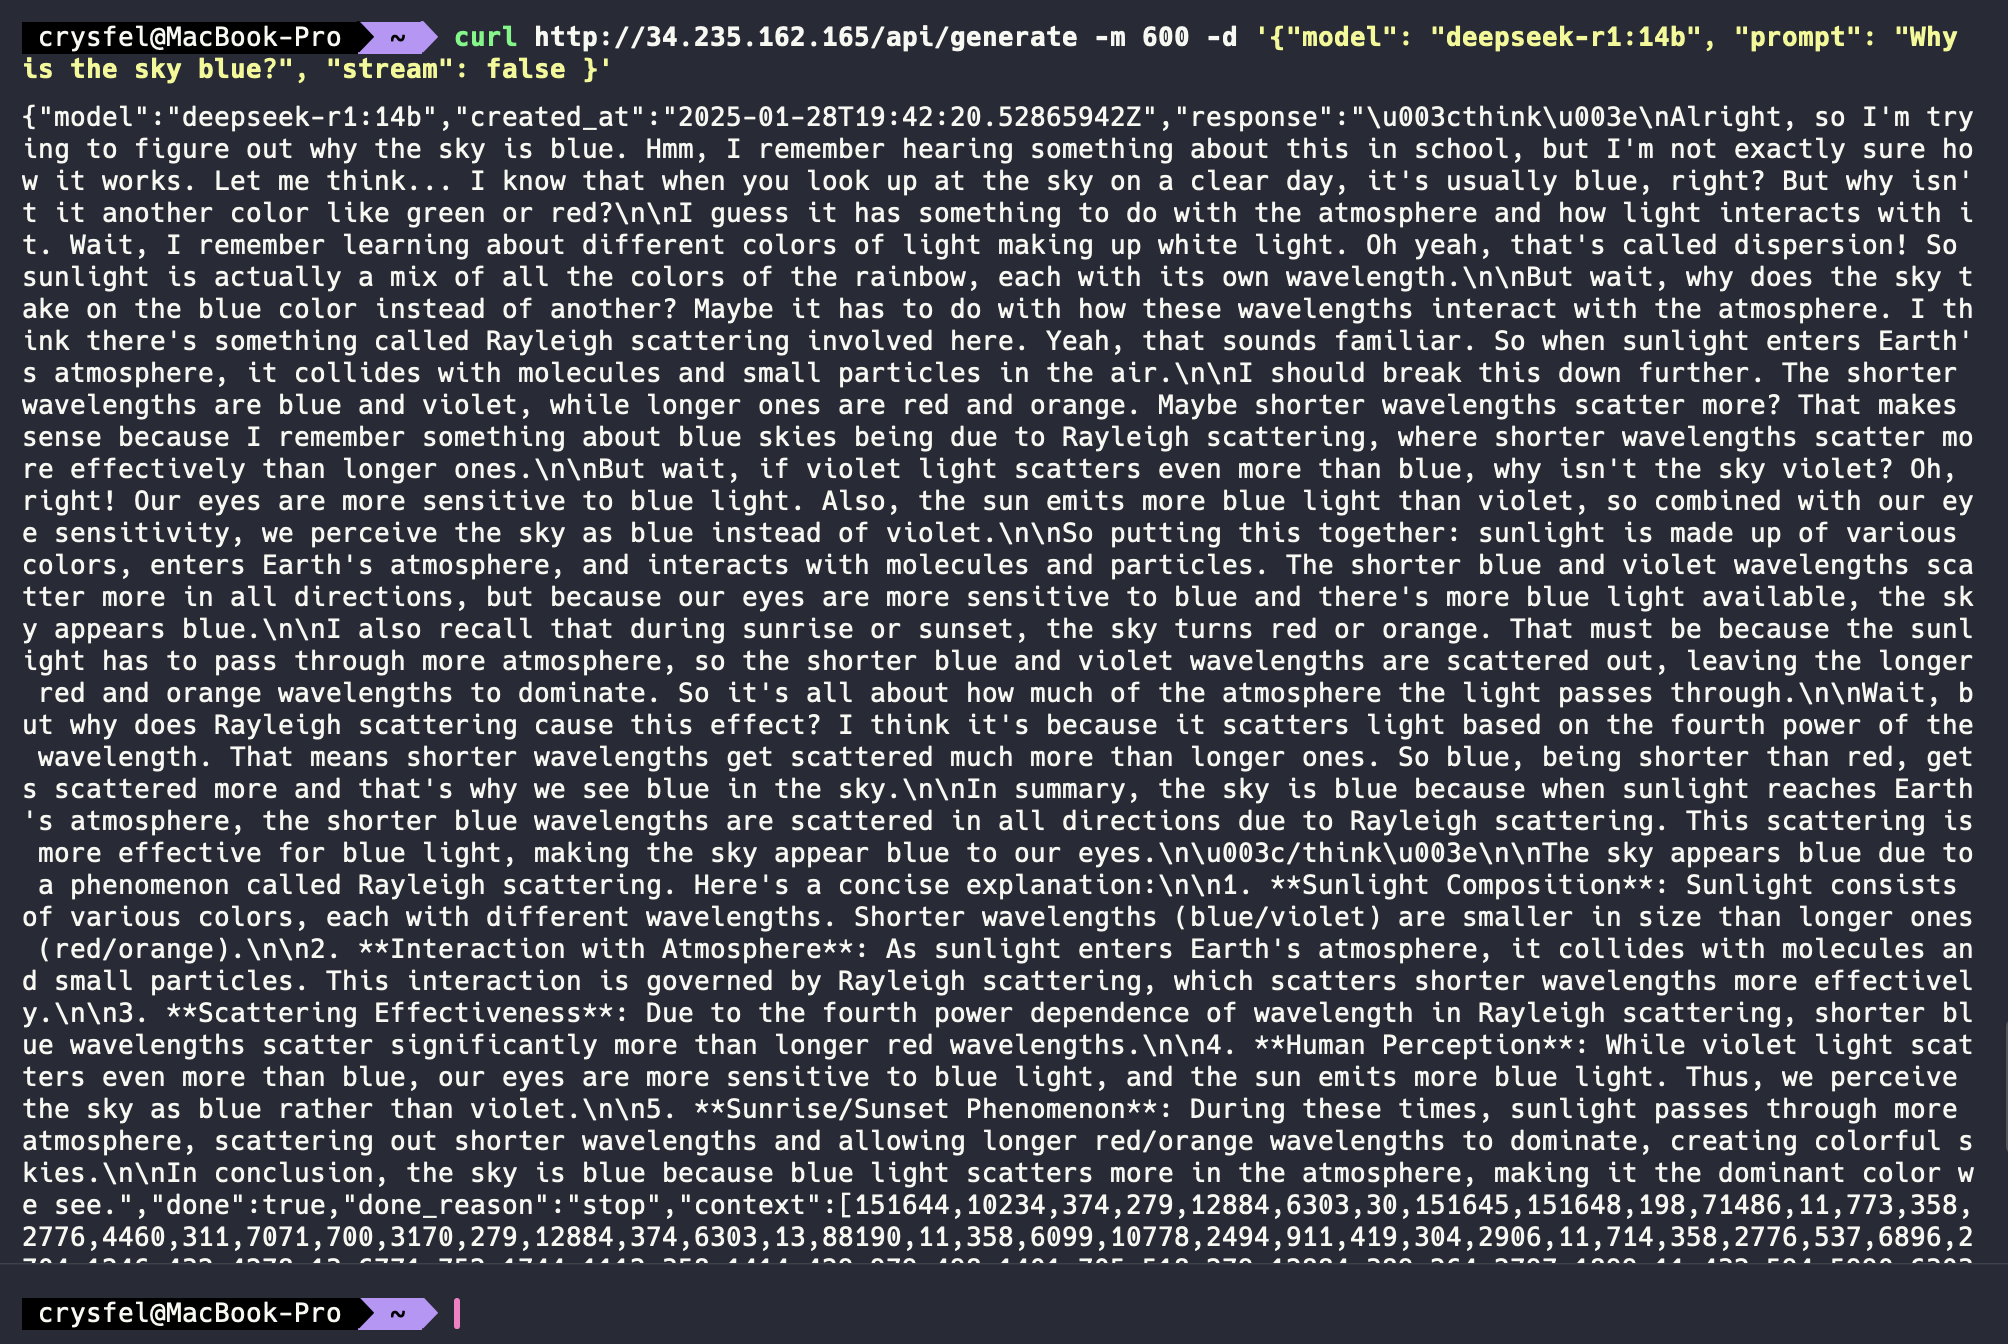
And that’s it! You are ready to start calling the REST API from your local computer. You can try by opening your terminal in your local computer (not in AWS) and firing a request with a prompt like this:
curl http://[YOUR-INSTANCE-IP]/api/generate -m 600 -d '{
  "model": "deepseek-r1:14b",
  "prompt": "Why is the sky blue?"
}'
It will take some time the first time as it needs to load the model, the -m param sets the time to 10 mins to give it enough time to respond. The -d is the payload on the POST request.
That’s it! Now you can call the REST API on your AWS instance! From here you can start building apps and software that uses this LLM, this is a game changer folks!
Happy Coding!
Did you like this post?
If you enjoyed this post or learned something new, make sure to subscribe to our newsletter! We will let you know when a new post gets published!